-->
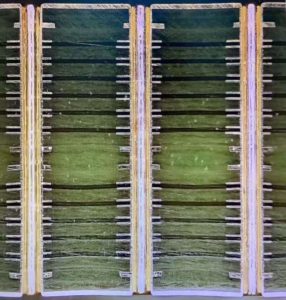
complex circuit board
2025-02-10

Introduction

A complex circuit board is not simply a PCB with many layers.

From a PCB manufacturing perspective, complexity usually comes from the interaction of multiple design and process requirements, such as high layer count, fine lines and spacing, small holes, high copper weight, blind or buried vias, controlled impedance, high-density BGA routing, special materials, tight tolerances, and demanding reliability requirements.

A 12-layer PCB with conventional line width, standard through holes, and a mature FR-4 stack-up may sometimes be easier to manufacture than a 6-layer PCB combining fine traces, 2 oz copper, small vias, controlled impedance, and tight registration tolerances.

This is an important point:

PCB complexity is usually determined by the combination of manufacturing parameters rather than by any single specification.

For designers and purchasing teams, understanding these interactions can help reduce PCB cost, improve manufacturing yield, shorten lead time, and avoid unnecessary reliability risks.

This guide explains complex circuit boards from a PCB manufacturing and DFM perspective, including what makes a PCB difficult to manufacture, the major process risks, cost drivers, testing requirements, and practical ways to simplify a complex PCB without sacrificing performance.

complex circuit board

complex circuit board


What Is a Complex Circuit Board?

A complex circuit board, also commonly called a complex PCB, is a printed circuit board whose design requires tighter-than-standard manufacturing control because of its electrical, mechanical, material, dimensional, or reliability requirements.

Complexity may come from one or several characteristics:

  • High layer count
  • Fine line width and spacing
  • Small drilled holes or microvias
  • High aspect ratio holes
  • Blind and buried vias
  • Via-in-pad structures
  • Fine-pitch BGA routing
  • Controlled impedance
  • Heavy copper
  • High-frequency materials
  • Mixed or special material structures
  • Tight finished thickness requirements
  • Tight registration tolerances
  • Special surface finishes
  • High thermal requirements
  • High reliability requirements

Therefore, there is no universal layer count at which a PCB suddenly becomes a “complex PCB.”

A 4-layer board can be complex.

A 12-layer board can sometimes be relatively straightforward.

The complete combination of design parameters determines the real manufacturing difficulty.


What Really Makes a PCB Complex?

The following factors commonly increase PCB manufacturing complexity.

Factor Relatively Conventional Design Increasing Complexity Main Manufacturing Impact
Layer count 2–6 layers 8–20+ layers Lamination, registration, material and yield
Line/space 6/6 mil or above 4/4 mil and below Imaging, etching and yield
Copper weight 1 oz 2 oz and above Etching, resin filling and thickness control
Finished hole 0.30 mm or larger 0.20 mm and below Drilling, plating and aspect ratio
Via structure Through hole Blind/buried/microvia Additional processes and lamination
BGA Conventional pitch Fine-pitch BGA Registration and routing density
Impedance Not controlled Multiple controlled impedances Stack-up and process tolerance
Material Standard FR-4 High-Tg, PTFE, Rogers, ceramic, etc. Lamination and process compatibility
Board thickness Conventional Very thin or very thick Handling, drilling and dimensional control
Tolerance Standard Tight dimensional tolerance Smaller manufacturing window

However, this table only tells part of the story.

The real difficulty often appears when two or more demanding specifications are combined on the same PCB.


PCB Complexity Comes From Parameter Interaction

One of the most important lessons in complex PCB manufacturing is that individual specifications cannot always be evaluated independently.

A design feature that is easy to manufacture by itself may become difficult when combined with another requirement.

Example 1: Fine Lines + Heavy Copper

A 6/6 mil trace and spacing design is generally manageable with conventional copper thickness.

A 2 oz copper PCB is also a common manufacturing requirement.

But combining:

6/6 mil line/space + 2 oz copper

creates a considerably narrower manufacturing window.

Why?

During copper etching, the etchant removes copper vertically but also produces lateral etching. As copper becomes thicker, maintaining narrow trace widths and spaces becomes more difficult.

This can affect:

  • Final conductor width
  • Conductor cross-section
  • Spacing between traces
  • Impedance
  • Etching uniformity
  • Manufacturing yield

For this reason, when a PCB combines fine lines with heavy copper, the manufacturer should review the design before production rather than evaluating line width and copper weight independently.

In some projects, reducing the copper requirement from 2 oz to 1.5 oz, where electrically acceptable, can provide a significantly better manufacturing margin.


Example 2: Small Hole + Thick PCB

A small drilled hole is not automatically a major manufacturing problem.

The PCB thickness must also be considered.

For example:

0.20 mm hole on a 1.0 mm PCB

and

0.20 mm hole on a 2.0 mm PCB

have very different manufacturing difficulty.

The second design has a much higher hole aspect ratio.

As aspect ratio increases, several processes become more demanding:

  • Drilling quality
  • Hole-wall cleaning and desmear
  • Electroless copper deposition
  • Electroplating distribution
  • Copper thickness inside the hole
  • Long-term plated-through-hole reliability

This is why PCB manufacturers evaluate hole diameter and board thickness together.

Simply asking, “Can you make a 0.20 mm hole?” does not provide enough information.


Example 3: High Layer Count + Heavy Inner Copper

Increasing layer count alone increases material consumption and process steps.

But combining:

high layer count + heavy inner-layer copper

creates additional lamination challenges.

Heavy inner copper produces greater height differences between copper and non-copper areas. During lamination, the prepreg resin must adequately fill these areas.

The manufacturer must consider:

  • Prepreg type and resin content
  • Copper distribution
  • Resin filling capability
  • Lamination pressure
  • Lamination temperature
  • Final board thickness
  • Layer-to-layer registration
  • Potential voids
  • Delamination risk

For heavy inner copper designs, using an appropriate prepreg structure and maintaining balanced copper distribution become especially important.


Complex PCB Manufacturing Capabilities

Manufacturing a complex circuit board requires more than simply adding additional processes. The entire production flow must remain controlled from engineering review through final inspection.

Depending on project requirements, complex PCB manufacturing may involve:

  • Multilayer PCB structures
  • HDI structures
  • Blind and buried vias
  • Via-in-pad
  • Fine-line circuitry
  • Controlled impedance
  • Fine-pitch BGA designs
  • Heavy copper
  • High-Tg FR-4
  • Rogers and other high-frequency materials
  • PTFE-based materials
  • Rigid-flex and other special PCB structures
  • Special thickness requirements
  • ENIG, HASL, OSP, immersion silver, Hard Gold and Gold Flash surface finishes
  • AOI inspection
  • Flying probe or fixture electrical testing
  • Impedance testing
  • Microsection analysis

At Shuoqiang Electronics, PCB manufacturing is supported by processes including circuit-pattern LDI, solder mask LDI, AOI, CNC drilling, lamination, surface finishing and electrical testing.

For complex PCB projects, engineering review before production is particularly important because many manufacturing risks can be identified before material is released to the production floor.


Complex PCB Manufacturing Process

A complex PCB follows the same fundamental manufacturing principles as a conventional printed circuit board, but several stages require tighter control.

1. Engineering and DFM Review

Before production, the manufacturer should review:

  • Gerber data
  • Drill files
  • Stack-up
  • Copper weight
  • Minimum line width and spacing
  • Minimum hole size
  • BGA structure
  • Blind and buried vias
  • Controlled impedance requirements
  • Finished board thickness
  • Surface finish
  • Special tolerances

For complex PCBs, DFM review is not merely a file check.

The purpose is to identify combinations of parameters that could reduce yield, increase cost, or create reliability risks.

Complex PCB Manufacturing Process

Complex PCB Manufacturing Process


2. Material and Stack-Up Confirmation

Material selection affects:

  • Electrical performance
  • Impedance
  • Thermal performance
  • Dimensional stability
  • Lamination behavior
  • Reliability
  • Cost

Standard FR-4 may be appropriate for many complex boards, while high-speed or high-frequency designs may require materials such as Rogers or PTFE-based laminates.

The stack-up should be confirmed before manufacturing, particularly for controlled-impedance PCBs.


3. Inner-Layer Imaging and AOI

As line density increases, accurate imaging becomes increasingly important.

LDI can reduce issues associated with conventional photographic films, such as film expansion, shrinkage, scratches and alignment errors.

After inner-layer imaging and etching, AOI is used to detect defects such as:

  • Opens
  • Shorts
  • Copper residues
  • Trace defects
  • Pattern abnormalities

Detecting these defects before lamination is important because an inner-layer defect cannot be economically repaired after the multilayer PCB has been laminated.


4. Lamination

Lamination is one of the most important stages in multilayer PCB manufacturing.

The process must control:

  • Layer alignment
  • Resin flow
  • Pressure
  • Temperature
  • Copper distribution
  • Final thickness

As layer count, copper weight and structural complexity increase, the lamination window becomes narrower.

A symmetrical stack-up and balanced copper distribution can help reduce warpage and improve dimensional stability.

The Art and Science of Creating Printed Circuit Boards

The Art and Science of Creating Printed Circuit Boards


5. Drilling and Hole Preparation

Complex PCBs may contain:

  • Standard plated through holes
  • Small mechanical holes
  • Blind vias
  • Buried vias
  • Microvias
  • Via-in-pad structures

Mechanical drilling parameters, drill-bit condition and hole-wall quality directly affect subsequent plating reliability.

After drilling, proper hole cleaning and desmear are important for achieving reliable copper adhesion to the hole wall.


6. Copper Plating

Plated-through-hole reliability depends heavily on copper plating quality.

High aspect ratio holes are more difficult because achieving uniform copper distribution from the surface to the center of the hole becomes increasingly challenging.

For complex boards, manufacturers must control:

  • Hole-wall copper coverage
  • Plating thickness
  • Plating uniformity
  • Surface copper thickness
  • Current distribution

A PCB may look perfect externally while still containing a weak plated hole. This is why appearance alone cannot determine PCB reliability.


7. Outer-Layer Imaging and Etching

Outer-layer manufacturing becomes increasingly sensitive when the design combines:

  • Fine lines
  • Heavy copper
  • Dense routing
  • Tight impedance requirements

Etching compensation must account for copper thickness and process characteristics.

This is another reason why specifying very narrow traces together with unnecessary heavy copper can increase PCB cost and reduce manufacturing yield.


8. Solder Mask

Solder mask alignment becomes particularly important around:

  • Fine-pitch BGA pads
  • Small SMD pads
  • Dense component areas
  • Fine solder mask dams

LDI solder mask exposure can improve registration accuracy by eliminating photographic-film-related variation.

For complex PCBs, accurate solder mask registration helps reduce exposed copper, pad encroachment and other assembly-related risks.

Complex PCB Manufacturing Process

Complex PCB Manufacturing Process


9. Surface Finish

Surface finish should be selected according to the actual application rather than simply choosing the most expensive option.

Common finishes include:

  • HASL
  • Lead-free HASL
  • ENIG
  • OSP
  • Immersion silver
  • Gold Flash
  • Hard Gold

For example, boards with fine-pitch BGA pads often benefit from the flat surface provided by ENIG, while connector contact areas may require Hard Gold for improved wear resistance.

The correct surface finish depends on solderability, flatness, contact requirements, storage, reliability and cost.


10. Electrical Testing and Final Inspection

Complex PCBs should be electrically tested before shipment.

Testing may include:

  • Flying probe testing
  • Fixture testing
  • AOI
  • Impedance testing
  • Microsection inspection
  • X-ray inspection where appropriate
  • Dimensional inspection
  • Final visual inspection

For prototypes and smaller quantities, flying probe testing can avoid the cost and lead time of dedicated electrical test fixtures.

For higher-volume production, fixture testing may provide better production efficiency.


Major Challenges in Complex Circuit Board Manufacturing

Signal Integrity and Controlled Impedance

Signal integrity is not determined only by PCB layout.

From a manufacturing perspective, controlled impedance can be affected by:

  • Finished trace width
  • Finished copper thickness
  • Dielectric thickness
  • Material dielectric constant
  • Resin content
  • Etching variation
  • Solder mask

Therefore, for impedance-controlled complex PCBs, designers should not define the stack-up independently and assume the finished PCB will automatically achieve the target impedance.

The PCB manufacturer should review the stack-up and manufacturing parameters before production.


Thermal Management

Higher component density can produce concentrated heat.

Common PCB-level thermal-management methods include:

  • Thermal vias
  • Copper planes
  • Heavy copper
  • Metal-core structures
  • Thermal separation structures
  • High-thermal-conductivity materials

However, thermal conductivity values vary enormously between materials.

Standard FR-4 provides relatively poor heat conduction compared with metals or advanced thermal substrates.

Therefore, material selection should be based on the real heat path rather than simply choosing a material marketed as “high thermal conductivity.”


Layer Registration

As layer count increases, maintaining registration between layers becomes increasingly important.

Material expansion and contraction, copper distribution, lamination conditions and imaging accuracy can all affect registration.

This becomes especially critical when the design includes:

  • Small annular rings
  • Dense BGA areas
  • Blind/buried vias
  • Small pads
  • Tight drill-to-copper clearances

Mechanical and Thermal Reliability

Copper and FR-4 do not expand at exactly the same rate during heating and cooling.

Repeated thermal cycling therefore places stress on plated holes, pads and laminated structures.

Higher complexity can introduce additional interfaces and process steps, which is why unnecessarily complex structures should be avoided where a simpler design can provide the same electrical function.


What Makes a Complex PCB Expensive?

Complex PCB cost is not determined by board area alone.

Several design parameters can significantly affect manufacturing cost.

Layer Count

Layer count is one of the largest PCB cost drivers.

Additional layers generally require:

  • More copper-clad laminate and prepreg
  • Additional inner-layer imaging and etching
  • More AOI inspection
  • More complex lamination
  • More engineering control
  • Lower overall manufacturing yield

Therefore, increasing a PCB from 4 layers to 6 layers is not simply adding two sheets of copper.


Material

Standard FR-4 is generally more economical than:

  • High-Tg materials
  • Rogers laminates
  • PTFE materials
  • Ceramic substrates
  • Other specialty materials

Material utilization can also become an important cost factor for unusual PCB dimensions.


Copper Weight

Increasing copper thickness adds raw-material cost and can also make etching and lamination more difficult.

Heavy copper should therefore be applied where the electrical or thermal design genuinely requires it.


Hole Structure

Standard through holes are usually the most economical.

Costs increase when the design requires:

  • Very small mechanical holes
  • Blind vias
  • Buried vias
  • Laser microvias
  • Via-in-pad
  • Filled and capped vias
  • Multiple sequential lamination cycles

Fine Lines and Tight Tolerances

A design close to the manufacturer’s process limit generally has a lower manufacturing margin.

Lower manufacturing margin can mean:

  • More engineering review
  • More process control
  • Lower yield
  • Higher inspection requirements
  • Higher final cost

Surface Finish

Different surface finishes have different material and processing costs.

The correct approach is not:

Which finish is the best?

It is:

Which finish provides the required performance at an appropriate cost?


How to Reduce Complex PCB Cost Without Reducing Reliability

One of the best ways to reduce complex PCB cost is to remove unnecessary complexity.

1. Reduce Layer Count Where Practical

Sometimes routing can be optimized without adding additional PCB layers.

In certain designs, even a strategically placed 0Ω resistor used as a jumper can help avoid an unnecessary layer increase.

Reducing layer count can provide several benefits:

  • Lower material cost
  • Fewer manufacturing processes
  • Simpler lamination
  • Shorter lead time
  • Potentially better manufacturing yield
  • Fewer structural interfaces

The objective is not always to build the PCB with the fewest possible layers.

The objective is to use the simplest structure that reliably satisfies the electrical requirements.


2. Avoid Unnecessarily Small Holes

If a 0.25 mm finished hole meets the design requirement, there may be little benefit in specifying 0.20 mm simply because it is technically possible.

A slightly larger hole can improve:

  • Drilling margin
  • Plating capability
  • Reliability
  • Manufacturing yield

3. Avoid Unnecessarily Fine Lines

Moving a design away from the manufacturing limit can significantly improve production stability.

A few routing changes during PCB design can sometimes save much more money than negotiating the PCB unit price after the design is complete.


4. Use Heavy Copper Only Where Required

Heavy copper is valuable for high-current and thermal applications.

But applying heavy copper to layers that do not require it can increase both material cost and manufacturing difficulty.


5. Use Blind and Buried Vias Only When Necessary

HDI technology is extremely useful when density requires it.

However, if conventional through-hole routing can achieve the same electrical function without unacceptable board-size growth, it may provide a simpler and more economical PCB structure.


6. Involve the PCB Manufacturer Early

One of the cheapest times to solve a manufacturing problem is before production begins.

A DFM review can identify:

  • Unnecessary layer count
  • Difficult line/space combinations
  • Excessively small holes
  • Problematic copper distribution
  • Stack-up risks
  • Impedance concerns
  • Expensive via structures
  • Surface-finish mismatches

A small design adjustment can sometimes create a much larger manufacturing cost reduction.


Testing and Quality Control for Complex PCBs

Complex PCBs require appropriate inspection at different manufacturing stages.

No single test can detect every potential PCB defect.

Inner Layers

AOI can detect pattern defects before lamination.

Plated Holes

Microsection analysis can be used to evaluate:

  • Hole-wall copper
  • Plating quality
  • Layer registration
  • Internal structure

Controlled Impedance

Test coupons and impedance measurement can verify whether the manufactured PCB meets the required impedance range.

Electrical Connectivity

Flying probe or fixture testing verifies opens and shorts.

Blind Vias and Hidden Structures

X-ray or microsection inspection may be used depending on the structure and quality requirement.

Final Inspection

Dimensions, surface finish, solder mask, marking and visual quality should be checked before shipment.

For high-reliability complex PCBs, quality should be built into the manufacturing process rather than relying only on final inspection.


Applications of Complex Circuit Boards

Complex PCBs are widely used where high circuit density, electrical performance, miniaturization or reliability is required.

Typical applications include:

Industry Typical Requirements
Telecommunications High-speed signals, impedance control, high-frequency materials
Industrial electronics Reliability, long service life, thermal management
Automotive electronics Thermal cycling, vibration resistance, reliability
Medical electronics High reliability, miniaturization, traceability
Data and networking equipment High-speed routing, multilayer structures, impedance
Aerospace electronics Reliability, special materials, environmental resistance
Advanced consumer electronics High density, fine-pitch components, compact dimensions

The appropriate PCB structure depends on the actual electrical, mechanical, thermal and reliability requirements of the application.


Is a More Complex PCB Always Better?

No.

A PCB should be as complex as necessary — but no more complex than necessary.

More layers, smaller holes, finer traces, heavier copper and advanced via structures may provide important design advantages.

But every additional manufacturing requirement can also introduce:

  • Additional process steps
  • Smaller manufacturing margins
  • Higher cost
  • Longer lead time
  • More potential reliability interfaces

Good PCB engineering therefore balances:

Electrical Performance + Manufacturability + Reliability + Cost

rather than maximizing complexity.


Why DFM Matters More for Complex Circuit Boards

For a conventional PCB, a minor design issue may only have a small impact on production.

For a complex PCB, several marginal specifications can interact and create a significant manufacturing problem.

That is why DFM review should consider the PCB as a complete manufacturing system.

A useful DFM review should evaluate not only whether each individual parameter is within capability, but also whether the combination of parameters provides sufficient production margin.

This difference is particularly important for:

  • Fine-line heavy-copper designs
  • High-aspect-ratio holes
  • High-layer-count PCBs
  • Fine-pitch BGA designs
  • HDI structures
  • Controlled-impedance boards
  • Special-material PCBs

Frequently Asked Questions About Complex Circuit Boards

What is considered a complex circuit board?

There is no single definition based only on layer count. A PCB becomes complex when its combination of layer count, line width, hole size, copper thickness, via structure, material, impedance, tolerance, density or reliability requirements creates a narrower manufacturing window.

Is a multilayer PCB always a complex PCB?

No. A conventional multilayer PCB using mature materials, standard through holes and generous design rules may be relatively straightforward to manufacture. A lower-layer-count PCB with fine lines, heavy copper and small vias may be more difficult.

Why are complex PCBs more expensive?

Complex PCBs often require more materials, additional processing, tighter manufacturing control, more inspection and lower process margins. Layer count, special materials, fine lines, small holes, HDI structures and heavy copper are common cost drivers.

Can reducing PCB layers improve reliability?

In some applications, a simpler PCB stack-up can reduce lamination complexity and the number of material interfaces. However, layer reduction should only be used when electrical performance, EMC, power integrity and routing requirements can still be satisfied.

Are smaller vias always better?

No. Smaller vias can help increase routing density, but they also increase drilling and plating difficulty. The via size should be selected according to actual routing requirements, board thickness and reliability requirements.

When should blind or buried vias be used?

Blind and buried vias are valuable when routing density or BGA escape requirements cannot be achieved efficiently with conventional through holes. They should not be added simply to make a design more advanced because they increase process complexity and cost.

Which surface finish is best for a complex PCB?

There is no universal best surface finish. ENIG is commonly selected for fine-pitch and BGA applications because of its flat surface. Hard Gold may be more appropriate for wear-resistant contact areas, while HASL, OSP, Gold Flash and other finishes have different advantages depending on application and cost.

Why should the PCB manufacturer review the stack-up before production?

Finished impedance, thickness, registration and reliability depend on actual laminate thickness, copper thickness, resin content and manufacturing capability. Early stack-up confirmation helps avoid redesign and manufacturing problems.


Conclusion

A complex circuit board is not defined simply by having more layers, smaller vias, or finer traces.

The real manufacturing difficulty comes from how these requirements interact.

Fine lines may be straightforward with conventional copper but become difficult when combined with heavy copper. Small holes may be manageable on a thin PCB but challenging on a thick board. High layer count may be relatively stable with a mature stack-up but considerably more difficult when combined with heavy inner copper, tight registration, controlled impedance, or special materials.

For this reason, successful complex PCB manufacturing requires more than advanced equipment.

It requires understanding the relationship between PCB design, materials, manufacturing processes, cost, yield, and long-term reliability.

The best complex PCB is not necessarily the PCB using the most advanced manufacturing technology.

It is the PCB that achieves the required electrical and mechanical performance with a structure that can be manufactured reliably, repeatedly, and economically.

For complex PCB projects, early DFM communication between the designer and PCB manufacturer can often prevent problems before production starts.

If you have a complex circuit board project, send your Gerber files, stack-up, quantity, copper requirements, and special specifications to our engineering team for DFM review and quotation.

Product Center
Contact Us

Get A Quote

2GNLvz
Quote
E-mail
info@sqpcb.com
Whatsapp
+86 136 0306 3656