How to Find Ground on a Circuit Board: Methods and Techniques
Understanding how to locate ground (GND) on a circuit board is essential for troubleshooting, designing, and repairing electronic circuits. Ground serves as a common reference point for voltage measurements and plays a crucial role in ensuring signal integrity, safety, and circuit stability.
In this article, we will explore various methods to find ground on a PCB (Printed Circuit Board), the importance of ground connections, and practical troubleshooting tips.
how to find ground on a circuit board
1. What is Ground (GND) in a Circuit?
Ground (GND) is the zero-voltage reference point in an electrical circuit. It is used as a return path for electric current and provides stability to circuit operation. Ground connections can be:
- Chassis Ground – Connected to the metal casing of a device for safety and shielding.
- Signal Ground – Used as a reference for low-voltage signals in analog and digital circuits.
- Earth Ground – Connected to the physical earth to prevent electrical hazards.
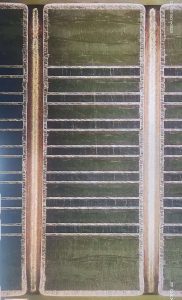
On a PCB, the ground plane is typically a large copper area that helps in reducing electrical noise and improving circuit performance.
2. how to find ground on a circuit board, Methods
There are multiple ways to identify ground connections on a PCB. Below are the most effective methods:
(1) Check the PCB Silkscreen Labels
- Many PCBs clearly mark ground points with labels such as “GND,” “-” (negative), or the ground symbol (⏚).
- Ground connections are often found near power supply pins, connectors, or mounting holes.
(2) Identify Large Copper Areas or Ground Planes
- PCBs typically have a large ground plane covering most of the board.
- These large copper areas act as a low-resistance return path for current.
- Use visual inspection to find a large unbroken copper section connected to multiple components.
(3) Use a Multimeter to Find Ground
A multimeter is a reliable tool for detecting ground on a PCB. Follow these steps:
✅ Step 1: Set the multimeter to continuity mode (🔊 symbol).
✅ Step 2: Place one probe on the metal casing of the power jack, USB port, or ground pin of a component.
✅ Step 3: Place the other probe on suspected ground points on the PCB.
✅ Step 4: If the multimeter beeps, it confirms a ground connection.
Multimeters can also be used in resistance mode (set to ohms (Ω)). A low resistance (close to 0Ω) confirms a ground connection.
(4) Check the Power Supply Section
- Ground is often found near power supply circuits such as:
- Voltage regulators (e.g., 7805, LM317, or DC-DC converters).
- Capacitors and diodes connected to power input terminals.
- Many PCBs group power (VCC) and ground (GND) traces near each other, making them easier to locate.
(5) Follow the Negative Side of Electrolytic Capacitors
- Electrolytic capacitors have a negative (-) lead, which is usually connected to ground.
- Look for the stripe or minus (-) symbol on capacitors to identify the negative lead.
(6) Identify Ground Pins on Common Components
Certain components have standard ground pin configurations:
| Component | Common Ground Pin |
|---|---|
| Voltage Regulator (e.g., 7805, 317, 1117) | Middle pin or tab |
| Integrated Circuits (ICs) | Pin marked “GND” in the datasheet |
| Microcontrollers (MCUs) | Often pin 8, 20, or 40 (varies by model) |
| Transistors (NPN, PNP) | Emitter (for some circuits) |
| Diodes and LEDs | Cathode (depending on the circuit design) |
Checking the datasheet of components can confirm which pin is ground.
(7) Look for Test Points or Ground Symbols
- Many PCBs have test points labeled as “GND” or a ground pad for easy access.
- These test points are used during manufacturing and debugging.
(8) Use an Oscilloscope or Signal Tracer
- An oscilloscope probe’s ground clip should be connected to a true ground point for accurate signal measurement.
- If an oscilloscope shows a 0V DC signal at a suspected point, it is likely a ground connection.
3. Troubleshooting Common Ground Issues
Incorrect grounding can cause electrical noise, unstable circuits, and even damage to components. Below are some common grounding problems and solutions:
| Issue | Cause | Solution |
|---|---|---|
| Floating Ground | No direct connection to PCB ground plane | Ensure ground traces connect properly |
| Ground Loop | Multiple ground paths create unwanted noise | Use a single-point ground design |
| Noisy Ground | High-frequency circuits causing interference | Use a solid ground plane and short return paths |
| High Resistance Ground | Poor solder joints or thin ground traces | Use thicker ground traces or copper fills |
| Incorrect Ground Connection | Misplaced ground reference in design | Verify grounding in circuit schematics |
Proper grounding techniques help ensure stable and noise-free electronic designs.
4. Best Practices for PCB Grounding
When designing or repairing circuit boards, consider these best practices for ground connections:
✅ Use a large ground plane – This minimizes resistance and voltage drop.
✅ Avoid ground loops – Keep ground traces short and ensure a single ground reference.
✅ Separate analog and digital ground – Prevents signal interference.
✅ Ensure a strong connection – Poor soldering can create high-resistance grounds.
✅ Use proper shielding – Grounded shields reduce EMI and RF noise.
Following these best practices ensures reliable PCB performance and prevents grounding-related failures.
5. Conclusion
Find ground on a circuit board is essential for testing, troubleshooting, and designing electronic circuits. Using methods like multimeter testing, identifying ground planes, checking capacitor polarity, and referencing datasheets, you can accurately locate ground connections on a PCB.
For PCB design and assembly solutions, Shuoqiang Electronics (SQPCB) provides custom PCB manufacturing, high-quality assembly, and professional support. Contact us today for precision PCB fabrication and expert electronic solutions! 🚀

- long board pcb
- Flexible PCBs
- Special PCB
- Express Printed Circuit Board
- Pcb Prototype
- LED PCB
- PCB
- Printed Circuit Board
- Pcb meaning
- Pcb manufacturer
- Rigid pcb board
- Rigid Flex PCB
 Quote
Quote
 E-mail