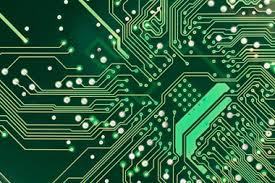
Printed Circuit Boards (PCBs) are the foundation of nearly every electronic device today. From smartphones to industrial machinery, PCBs provide the mechanical support and electrical connectivity that make modern electronics function. The process of manufacturing a PCB is a precise and multi-step process, requiring advanced technology and careful attention to detail. In this article, we’ll explore the fundamentals of PCB manufacturing, from design to final product.
1. Designing the PCB Layout
The first step in PCB manufacturing is the design process. Engineers use specialized software, such as CAD (Computer-Aided Design) or PCB design tools like Altium or Eagle, to create the layout of the PCB. This layout includes the arrangement of components, electrical connections, and layers required for the final design.
- Schematic Creation: The initial design begins with a schematic, which outlines how components will be interconnected on the board.
- Component Placement: Engineers decide the placement of resistors, capacitors, and other components for optimal functionality and space efficiency.
- Routing: In this stage, electrical connections or “traces” are routed between the components, ensuring that signals flow properly across the board.
Once the design is finalized, it is exported into a format like Gerber files, which are used for manufacturing.
2. Printing the PCB Design
After the design is complete, the manufacturing process begins. The first step is to print the PCB design onto a physical board. This is typically done by transferring the design onto copper-clad laminates, which will form the electrical connections.
- Photoresist Application: A thin layer of photoresist (a light-sensitive material) is applied to the surface of the copper laminate.
- Exposure to UV Light: The PCB design, in the form of a mask, is placed over the photoresist, and the board is exposed to UV light. The UV light hardens the photoresist in the areas where traces will remain.
- Etching: The board is then submerged in a chemical solution that etches away the unprotected copper, leaving behind the desired traces that form the circuit.
3. Drilling
Once the copper traces are in place, the next step involves drilling holes in the board. These holes, known as vias, are used to connect different layers of the PCB and to allow for the placement of components.
- Precision Drilling: Automated drilling machines use the PCB design files to drill exact holes for vias and through-hole components.
- Via Plating: After drilling, the holes are plated with copper to create electrical connections between the layers of the board.
4. Layering and Lamination
PCBs can have multiple layers, depending on the complexity of the design. The layers are carefully aligned and then laminated together to form a single, solid board.
- Inner Layer Alignment: The internal layers of a multi-layer PCB are aligned to ensure that all the traces and components line up correctly.
- Pressing and Lamination: Layers are stacked together and laminated under heat and pressure to fuse them into a cohesive board. This step ensures the board is durable and that all layers are securely bonded.
5. Plating and Coating
After lamination, the board undergoes further plating processes to enhance the conductivity of the traces and protect the board from oxidation and environmental factors.
- Electroless Plating: A thin layer of copper is plated onto the entire board, covering both the traces and the drilled holes, ensuring strong electrical connections.
- Solder Mask Application: A solder mask is applied to protect the copper traces from corrosion and to prevent solder bridges during the assembly process. The solder mask is usually green but can be found in various colors.
- Silkscreen Printing: This step adds labels, component identifiers, and logos to the PCB using a silkscreen printing process.
6. Surface Finishing
To prepare the board for component placement, surface finishes are applied to the exposed copper pads. These finishes ensure that the pads are solderable and provide long-term protection against oxidation.
- Hot Air Solder Leveling (HASL): This method involves coating the pads with solder and then leveling the surface with hot air.
- Electroless Nickel Immersion Gold (ENIG): A popular surface finish that provides excellent durability and solderability, often used in high-reliability applications.
7. Electrical Testing
Once the board is complete, it must be tested to ensure it functions correctly. Electrical testing verifies that there are no shorts, open circuits, or other defects in the PCB.
- Flying Probe Testing: For small batches, a flying probe test is performed to check the connectivity of the board without needing a physical test fixture.
- In-Circuit Testing (ICT): For larger batches, ICT involves using a custom fixture to test all of the board’s connections and components.
8. Component Assembly
After the PCB itself is manufactured, components are placed onto the board through a process known as PCB assembly (PCBA).
- Surface Mount Technology (SMT): For most modern PCBs, components are mounted on the surface using SMT machines, which precisely place components onto the solder pads.
- Through-Hole Assembly: For certain components, like connectors, through-hole technology is used. Components are placed into pre-drilled holes and soldered into place.
9. Final Inspection and Testing
Once the components are assembled, the PCB undergoes a final inspection and functional testing to ensure that it meets all design requirements.
- Automated Optical Inspection (AOI): This uses cameras to check the board for defects such as soldering errors or missing components.
- Functional Testing: The board is powered on and tested under real-world conditions to ensure it operates as intended.
Conclusion
PCB manufacturing is a complex process that involves multiple steps, from design to assembly. Each stage is crucial to ensuring the final product meets the desired specifications and functions reliably in its application. Understanding the fundamentals of PCB manufacturing gives you insight into how these critical components are made and why precision and quality control are essential at every step. Whether you’re designing a simple single-layer PCB or a complex multilayer board, a reliable manufacturing process is key to bringing your electronic product to life.

- long board pcb
- Flexible PCBs
- Special PCB
- Express Printed Circuit Board
- Pcb Prototype
- LED PCB
- PCB
- Printed Circuit Board
- Pcb meaning
- Pcb manufacturer
- Rigid pcb board
- Rigid Flex PCB
 Quote
Quote
 E-mail